
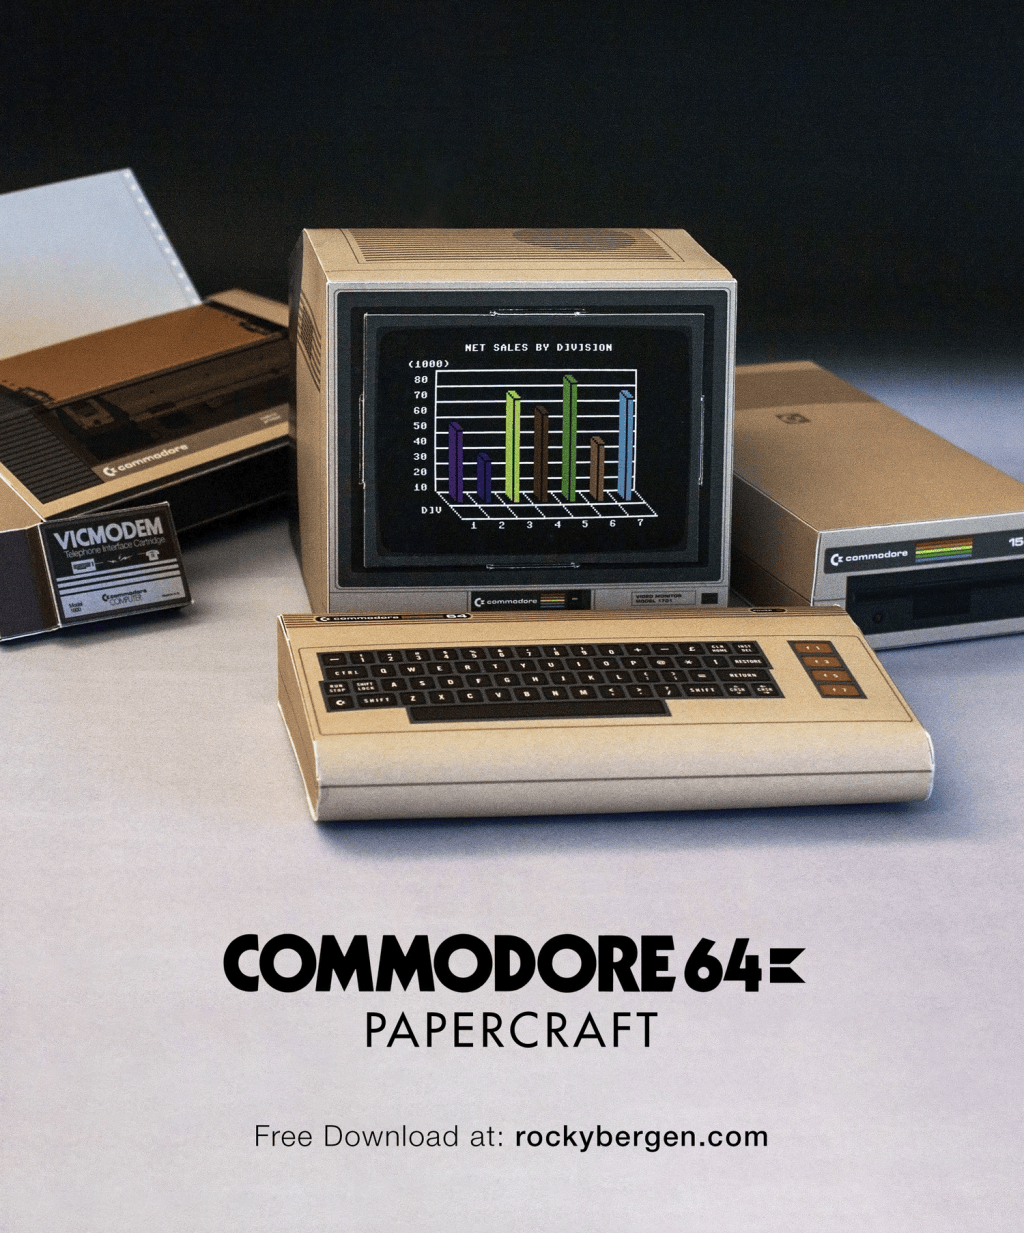
Well, that was a long week. When I posted Papercraft Friday #100, I figured there’d be a #101. I didn’t figure it would take sixteen years. But here we go!
I mentioned in The Lights Are Back On that I fixed the stuck keys on my Commodore 128 with 3D-printed replacements for the broken key plungers. I’ve been playing Ultima V on it with the original box and docs close at hand. So when I saw Rocky Bergen’s paper Commodore 64, it seemed like a good way to get Papercraft Friday going again. Apparently I have a thing for Commodores that require a little assembly. It didn’t hurt that I also have my original Commodore 64 set up, plus I have the new Commodore 64 Ultimate and Commodore 64C Ultimate, both Founder’s Editions (It’s back!!). Have I mentioned that I like Commodore?
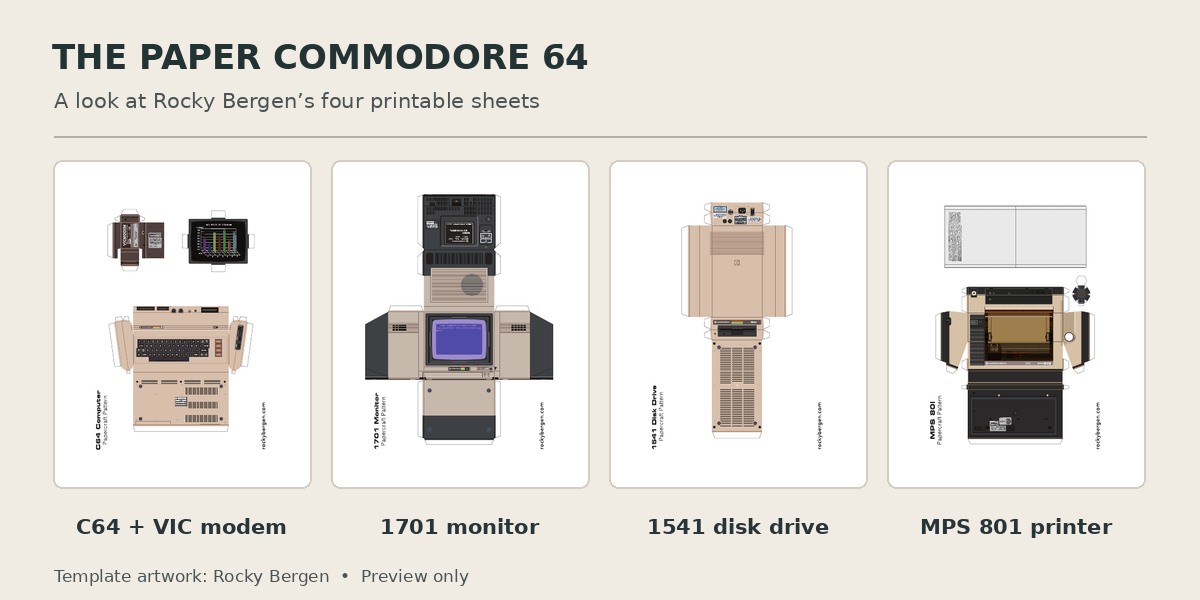
Remember the little Paper Mac from #23? This time you can build the whole desk setup: the C64, the 1701 monitor, the 1541 floppy drive, the VIC modem, and the MPS 801 printer. There’s even a little sheet of continuous-feed paper with a print test on it. That’s the detail that got me, combined with the fact that they are rather simple as papercraft are concerned, but the look is very detailed. Perfect to dip your toes into the world of papercraft.
Download the model
Download Rocky Bergen’s Commodore 64 papercraft (four-page PDF). The files are in the collection Bergen links from his papercraft site. No Pepakura needed. The sheets are laid out for A3 cardstock. If you’re printing on U.S. Letter, tile the pages at 100% to keep the original size. Then cut out the pieces, score the folds, and glue the tabs. If you want to see how the pieces look assembled, Bergen’s build photos show the finished setup.
You can start with just the computer and monitor. Of course, once you’ve made the C64, are you really going to leave it without a disk drive?
Not keen on this one? Check out the other Papercraft Friday posts.
Featured photo: Rocky Bergen’s assembled Commodore 64 papercraft. Photo by Rocky Bergen.





Leave a Reply